-1.png?height=120&name=Fitted%20Logo%20Transparent%20BG%20(1)-1.png)
Description: This document outlines how you can connect your inventory with a File Transfer Protocol. If you can export a CSV from your Point of Sale, you can integrate your inventory with Fitted! A File Transfer Protocol (FTP) integration allows for an easy upload of your inventory directly to Fitted’s server.
Steps:
Create a Fitted Account: https://www.fittedretail.com/account/sign-up- If you already have an account, you can log in here: https://www.fittedretail.com/account
- When you log in, you will see a “Getting Started” checklist. Click "DO THE THING" next to "Connect Your Inventory" as shown below:
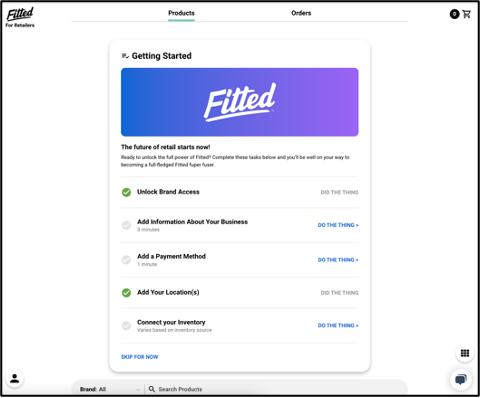
*You can also navigate here by clicking the person Icon in the lower left-hand corner and selecting integration - Click Connect point of sale, Select “other (File Drop)” in drop down Point of Sale Solution.
- Name your point-of-sale Solution
- Under “Does your POS require a password or SSH Public Key?”, select the preferred option.
- If selecting ‘Password’, create a new password that meets the password criteria as indicated within the portal. You can use your existing POS Password if it meets those criteria.
- If Selecting ‘SSH Public Key’, create a new SSH Public Key that begins with ‘SSH-RSA’. This could be found in your POS system as your existing SSH Public Key.
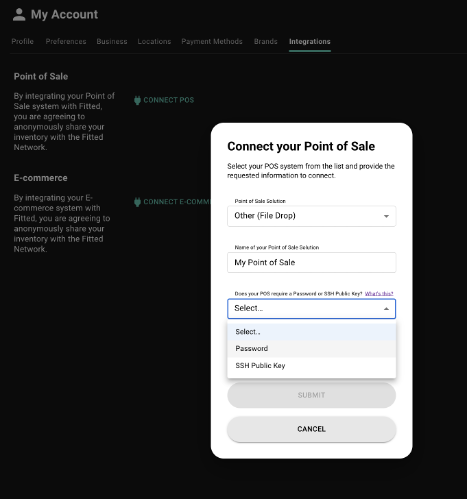
- Click Submit
- You will now see the three pieces of information provided by Fitted that you will use to establish a connection with your Point of Sale
- Server Web address (URL) sftp.commerce.fittedretail.com
- Username
- Password or SSH Private Key
- Navigate you’re your Point of Sale (POS) and locate your FTP connections.
- These are usually found in your POS “settings” or “exports”.*Note: Every POS is different and help for your specific POS can be found through the POS System “Help Center”.
- Within the FTP connections, enter in the three Fitted provided Credentials (Server web address, username, and Password/SSH Private Key)
- Once you have entered those credentials, specify the specific inventory file you want to send
- Select how often you want that inventory file sent to be set to the FTP server
- Best practice would be to send the inventory file to the FTP Server at least 1x a day.
- If your point of sale does not have an FTP Connection, You'll just need to download FileZilla.
- Open a new window in your browser and go to this web address https://filezilla-project.org/
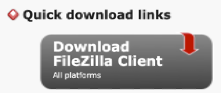
- Under the quick downloads section, click on the gray button “Download FileZilla Client”
- Under Quick Download links, click “Download FileZilla Client All Platforms”
- Click the green “Download FileZilla Client” for your appropriate platform (i.e. Windows, Mac or Linux)
*Not seeing your looking for? Click ‘Show additional download options’
- Click ‘Download’ under the FileZilla ColumnIf your point of sale does not have an FTP Connection, You'll just need to download FileZilla.
- Find the Downloaded zip file in your folders and downloadWithin the FTP connections, enter in the three Fitted provided Credentials (Server web address, username, and Password/SSH Private Key)
- Now double click on the FileZilla icon to open FileZilla.

- Once FileZilla is open, click ‘OK’
- Click on the icon of 3 computers in the upper left-hand corner of the screen.

- Click “New Site”
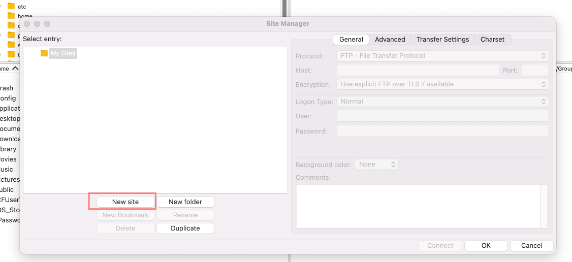
- Enter the information reads as follows:
- Select ‘SFTP - SSH File Transfer Protocol’ under the Protocol drop-down
- Type ‘sftp.commerce.fittedretail.com’, under the Host Column
- Type the Fitted Provided Username under the ‘User’ Column
- Enter the Fitted Provided Password under the ‘Password’ column
- Click “Connect”
- You will see two folders to add your inventory file to.
- If this is your first Inventory upload, Follow steps 19a-c. If this is an inventory update, follow steps 20a-c
- Add your file to the ‘Full’ Folder (Your first Inventory file should ALWAYS be dropped into the “Full” folder).
- This file should only be a list of all your products on hand.
- Full: This means that the inventory in that file will replace all current inventory Fitted has for your store.
- Once you’ve sent us your first inventory file, please email support@fittedretail.com and let us know you’ve sent it so we can verify it was received.
- Add your file to the ‘Partial’ Folder.
- This file should only be a list of all your products on hand.
- Partial: This means that the inventory included in that file is added to inventory we already have for your store.
- Once you’ve sent us your inventory file, please email support@fittedretail.com and let us know you’ve sent it so we can verify it was received.
- Within 24-48hrs, Fitted will you know let you know it has been received successfully and your POS integration is all set!
These steps for setting up an FTP connection are all very broad and high level as every Point of Sale has different steps involved. If you run into any issues, please don’t hesitate to contact us any time - support@fittedretail.com or (208) 994-3873